Step 1 Step 2 Step 3 Step 4 Step 5 Step 5 Step 6 Step 7 Step 9 Step 10 Step 11 Step 12 Step 13 Step 14 Step 15 Step 16 Posted at dphotonews.com in Photoshop
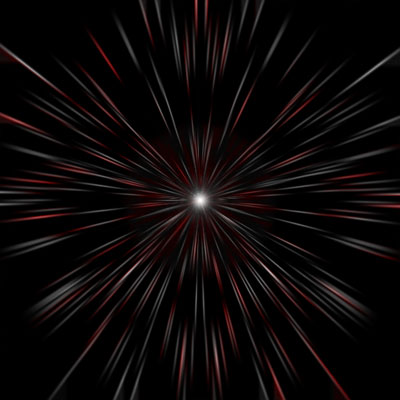
In this tutorial you'll learn how to make a warp speed effect just like one from Star Trek.
Warp speed effect
Create new document 300px x 300px, background white.
Create new layer and fill it with white. Pick Marquee tool, select Fixed Size, Width 300px and Height 10px. Click somewhere on document. Now we have selection 300px x 10px.
Go to the FILTER - NOISE - ADD NOISE and select values as I did

Press CTRL + L on keyboard to go to the levels menu. Make histogram look like this:

Press CTRL + T to transform selection. Pull the upper side of selection to the top of document and the bottom of selection to the bottom of document. Press ENTER when finished.
Now we have to make our canvas a bit larger so we'll press CTRL + ALT + C (or go to the IMAGE - CANVAS SIZE) and enter values of 600px for height and 600px for weight and set anchor point like I did
Copy our layer using CTRL + J. Apply transformation EDIT - TRANSFORM - FLIP HORIZONTAL. Move this layer to the left.
Copy layer using CTRL + J. Apply transformation EDIT - TRANSFORM - FLIP VERTICAL. Move this layer to the bottom left corner.
Step 8
Copy layer using CTRL + J. Apply transformation EDIT - TRANSFORM - FLIP HORIZONTAL. Move this layer to the right. Whole image should look like this
Merge down all the layers using CTRL + E. Final image should look like this

Invert image using CTRL + I.
Go to the FILTER - DISTORT - POLAR CORDINATES and select values as I did

Go to the FILTER - BLUR - RADIAL BLUR and enter these values

Copy this layer by pressing CTRL + J on keyboard. Set Blending mode of this layer to be Luminosity
Now to coloring. Click bottom layer and press CTRL + U, select Colorize and set these values

Select top layer (the one which blending mode is Luminosity), press CTRL + U, once again select Colorize and set these values

Click bottom layer go to the FILTER - BLUR - GAUSSIAN BLUR and set blur value to 2, then go to EDIT - TRANSFORM - ROTATE 90 CCW. Click OK
Click top layer go to the FILTER - RENDER - LENS FLARE and set these values

Our final photo looks like this

author of this tutorial is Vladimir Markovic
Sunday, July 29, 2007
Photoshop: Star Trek Warp Speed Effect
Posted by
JakF
at
5:28 AM
Labels: Photoshop
Subscribe to:
Post Comments (Atom)
Search
Categories
- 3D Studio Max (127)
- Abstracts (2)
- Adobe Illustrator (62)
- animation (4)
- artwork (5)
- batch (2)
- Beginner (7)
- Brushes (2)
- Color (7)
- colorization (8)
- Download (1)
- draw (12)
- Drawing (1)
- effect (28)
- filter (7)
- Fireworks (1)
- flash (1)
- FreeHand Tutorial (20)
- ImageReady (1)
- Info (2)
- Interface Design (2)
- layers (5)
- logo (5)
- mask (2)
- montage (4)
- morph (1)
- Motorola (2)
- Nokia (1)
- photo (22)
- Photo Retouch (2)
- photomerge (1)
- Photoshop (203)
- Photoshop Brush (3)
- Plugin (8)
- Psd (1)
- Resource (2)
- retouch (12)
- Sony Ericsson (2)
- text (9)
- Text Effect (4)
- texture (3)
- Textures and Patterns (2)
- Tips and Trick (3)
- tool (13)
- Tutor (1)
- vector (4)
- video (1)
- watermark (1)
- web (5)
- Web Graphics (2)

0 comments:
Post a Comment