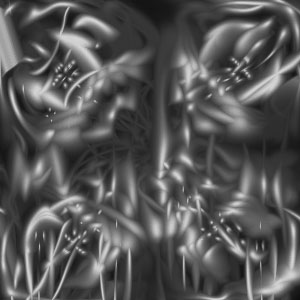
1. Open a new document of any size and fill it with black, then place some random Lens Flares on the same Layer (Filters->Render->Lens Flare) 3. Set the Layer mode Lighten and duplicate it 6 times 4. Start with Layer copy 6 and apply a Filter->Distrot->Twirl with value 50 then move to Layer copy 5 and that with a +50 value. On Layer copy 4 apply a Filter->Distrot->Polar Coordinates of your choise (I use Polar to Rectangular) and repeat it on Layer copy 3 on the Layer copy 2 layer apply a Filter->Distrot->Pinch with Amount 100%. On the remaining layer apply Filter->Distrot->Wave (I use Number of Generators=5, Wavelength=10-120, Amplitude=5-35, Scale=100%-100% and Type -Sine). ow merge all the layers. Posted at adobetutorialz.com in Photoshop
In this tutorial you'll learn to how to design an abstract background effect.
2. Apply Filter->Sketch->Chrome an use Detailes=3 and Smoothness=10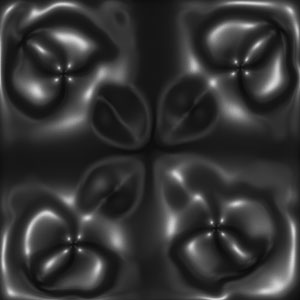
5. Create a new layer and apply a Radial Gradient of your choise (I use combination of color #FF6E02-#FFFF00-#FF6D00) an set the layer mode to Overlay.
Sunday, July 29, 2007
Photoshop: Abstract Effect Background
Posted by
JakF
at
8:13 AM
Labels: Photoshop
Subscribe to:
Post Comments (Atom)
Search
Categories
- 3D Studio Max (127)
- Abstracts (2)
- Adobe Illustrator (62)
- animation (4)
- artwork (5)
- batch (2)
- Beginner (7)
- Brushes (2)
- Color (7)
- colorization (8)
- Download (1)
- draw (12)
- Drawing (1)
- effect (28)
- filter (7)
- Fireworks (1)
- flash (1)
- FreeHand Tutorial (20)
- ImageReady (1)
- Info (2)
- Interface Design (2)
- layers (5)
- logo (5)
- mask (2)
- montage (4)
- morph (1)
- Motorola (2)
- Nokia (1)
- photo (22)
- Photo Retouch (2)
- photomerge (1)
- Photoshop (203)
- Photoshop Brush (3)
- Plugin (8)
- Psd (1)
- Resource (2)
- retouch (12)
- Sony Ericsson (2)
- text (9)
- Text Effect (4)
- texture (3)
- Textures and Patterns (2)
- Tips and Trick (3)
- tool (13)
- Tutor (1)
- vector (4)
- video (1)
- watermark (1)
- web (5)
- Web Graphics (2)

0 comments:
Post a Comment