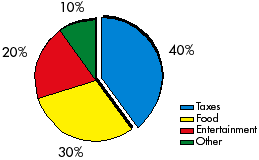
 Sure you can make Pie Charts with FreeHand 7 and above with the Xtra, but it doesn't make the prettiest chart. This tip describes how to make a 3D Pie Chart that takes a little practice at first but yields great results that will leave the Xtra in the dust. This tip can also be used in creating cutouts of other artwork as well.
Version: 5 and above
If you ever make Pie Charts using the Xtra with FreeHand then the above example may look familiar to you. Notice the drop shadow in a weird place (standard shadows usually go from top-left to bottom-right), large font sizes and strange placement of the Legend on the right.
Of course you can change things like the font size or face as well as scale or move things around like I did above by sub-selecting within the grouped chart.
But, as soon as you edit the chart data again (in the above legend I changed Taxes to Taxes/Bills) with the Xtra, it reverts to the original placement and sizes. This can be very frustrating. Below I describe how to make a Pie Chart without the Xtra that will be more 3D in appearance, though it isn't quite as dynamically editable as the charts created with the Xtra.
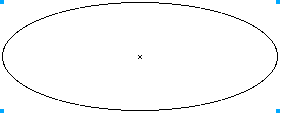
1) Start by drawing an ellipse of any size in your document. Then go into Keyline mode so you can see the center point of the ellipse.
2) Next you want to set up the Knife tool. Double click on the Knife tool so you see the above dialog box. Select the Straight option, and set the Width to 0. Lastly make sure the option Close cut paths is turned on.
3) Now before you do any cutting, make sure you know what percentages you want to divide the ellipse into. It's good to kind of draw it out on paper first to get an idea what would look the best. Above I drew a few lines to show where I'm going to cut, and placed them on the Background layer.
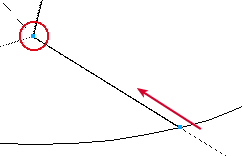
4) Now select the ellipse, and choose the Knife tool. The first cut will be on the top of the ellipse. Using the lines in the background as your guide, cut across the ellipse starting on the outside to the inside ending at the center point of the ellipse (example zoomed in slightly).
This creates a closed path where you cut into the ellipse shown above at right. What the path actually is, is a curve point that doubles-back onto itself giving the illusion of a straight line. You can't select the end of the line because of this. Go ahead and play with the cut point a little by stretching out the curve handles to see what I mean. Just make sure you Undo any playing before you continue.
5) This next step is very crucial to making this work correctly. It can sometimes be frustrating but once you get the hang of it, you'll be making Pie Charts in no time.
While the ellipse is still selected, make another cut similar to how you did above on the bottom. Only this time, make sure you end the cut in the exact same spot as the first cut. It may help to zoom in on the intersection area to get the cut exact.
You may get an error message that says something like "Could not complete your request because the selection is too complex." Just hit OK and try again until you don't get this message
You'll know if it worked when you see a point appear in the intersection area like the highlighted point above.

5b) Try testing to see if the cutting worked for you by deselecting the ellipse and choosing the new cut shape and pulling it away from the Pie. If you get the whole ellipse shape, then Undo and try Step 5 again until you see something like above.

6) Repeat Step 5 for the remaining cut areas like the above highlighted areas. Again, if you get the error message I noted above, keep trying, you'll eventually get it to cut.

6b) Again, test the shapes to make sure they cut correctly by pulling them apart. You should now have a bunch of Pie slice like above.

7) Clean up the center area by zooming in on the intersection spot. You may notice irregular points like above at left. Just reshape or remove unneeded points to make them pointy again like above at right. This may also include retracting any curve handles via the Inspector palette.

8) Now we're going to add a touch of 3D realism to this Pie Chart. First select all the shapes and Clone them. While the clones are still selected, move them down about an inch or so.
To make this easier to deal with I'll show you how to make one piece of the 3D Pie Chart first. I made a new layer and hid all but one piece of the Pie on that layer. You can do the same if you like.

9) Select the 2 outermost points on the bottom clone. Split them by choosing Split from the Modify menu.

10) Select the top half of the Split element. Shift+Drag it up so it completely overlaps the top part of the original shape.

11) While this piece is still selected, Shift+Click on the remaing part of the Split element, then Join them together from the Modify menu. The shape should look like the above example.

12) While it's still selected, choose Closed in the Inspector palette and it should look like above.

13) Now fill the piece in with some color. Here I used a Multi-Gradient fill. Select this piece and send it to the back to reveal the top part of the shape. Then fill in the top part with the same color.

14) Repeat Steps 9-12 for the remaining slices of the Pie Chart. If all went smoothly, you should now have a Pie Chart ready to go like the above example

15) Now you can add the final touches to the chart. Because you made each object a separate 3D element, you can pull them away from each other to make it more jazzy. Add a drop shadow (a simple blend) and make the text wrap around an ellipse to give more depth to the chart.
Like I said before, you can use this tip for other techniques involving "cutting" pieces away from other shapes and giving depth to otherwise flat art. After some practice, you can make art like this in less than an hour and impress the boss too.
Read More...
0 comments:
Post a Comment