| This tutorial is for creating metallic gradients with Macromedia® FreeHand. This tutorial uses version 9, but the steps should be the same for any version. |
1. Shown below is a preview of the gradient swatches. You can make them yourself following the steps in this tutorial or you can download the FreeHand 9 file itself:
| swatches.fh9.sit | swatches.fh9.zip | ||
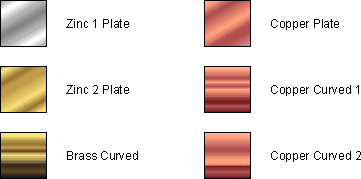 | |||
These gradients can be used for industrial metals. "Zinc 1" is the short name for "bright zinc" plating and "Zinc 2" is the short name for "yellow zinc" plating. The "Plate" gradients above are suitable for flat surfaces and the "Curved" gradients are best for curved surfaces.
All of the examples below show a screen shot of the Fill inspector and the color chips required. Following the specs for each gradient is a step-by-step procedure for making a gradient fill.
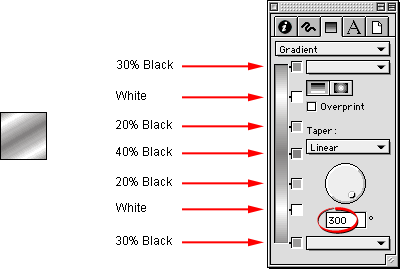
2. These are the specs for the "Zinc 1 Plate" gradient. Use the "Tints" tab of the Color Mixer and create the color chips from tints of black.
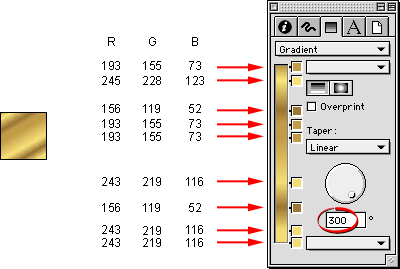
3. These are the specs for the "Zinc 2 Plate" gradient. Use the "Mixer" tab of the Color Mixer and create the color chips from the following RGB settings.
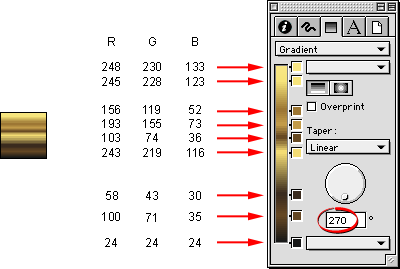
4. These are the specs for the "Brass Curved" gradient. Use the "Mixer" tab of the Color Mixer and create the color chips from the following RGB settings.
5. These are the specs for the "Copper Plate" gradient. Use the "Mixer" tab of the Color Mixer and create the color chips from the following RGB settings.
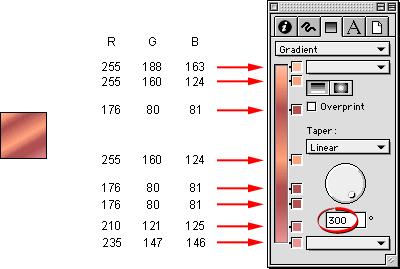
6. These are the specs for the "Copper Curved 1 " gradient. Use the "Mixer" tab of the Color Mixer and create the color chips from the following RGB settings.
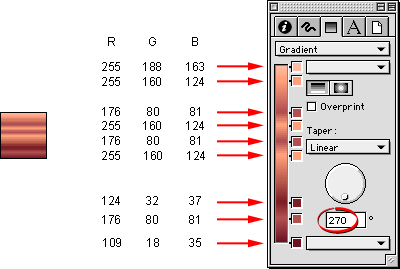
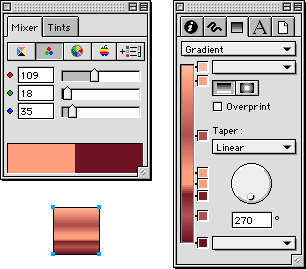
7. These are the specs for the "Copper Curved 2 " gradient. Use the "Mixer" tab of the Color Mixer and create the color chips from the following RGB settings.
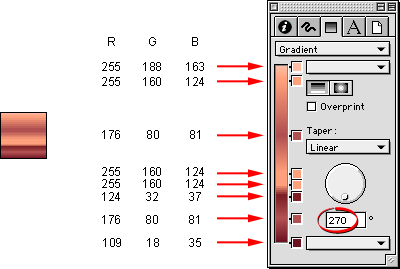
Creating a New Gradient: Step-by-Step
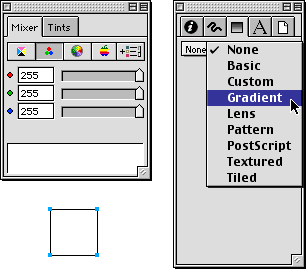
8. Create a small square with the Rectangle tool. Next, bring up the Color Mixer and press the RGB button (below left). Then bring up the Fill inspector and click on the Fill Types drop-down (circled below right):
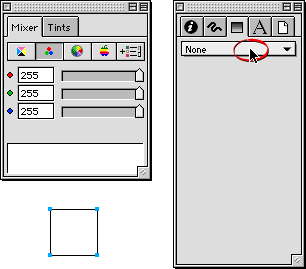
9. Select "Gradient" from the drop-down menu.
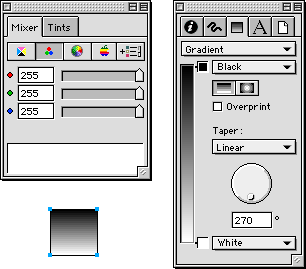
10. FreeHand will assign a default gradient. Note that the selected object displays the new gradient fill.
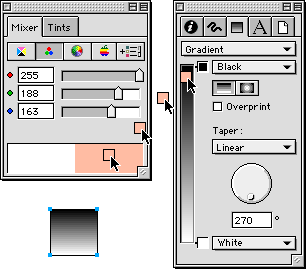
11. In this case we will be making the "Copper Curved 2" gradient. Start with the top color. Enter, 255, 188 and 163 in the R, G and B boxes, respectively (below left). Then use the Eyedropper tool to drag a color chip from the newly created color display onto the top color well in the Fill inspector.
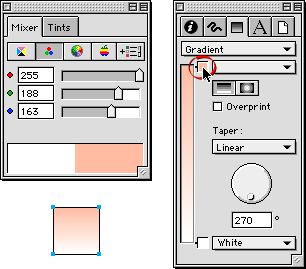
12. Drop the new color chip over the top color well (circled below right). When you release the mouse button, the selected object and the Fill inspector will reflect the change to the gradient.
13. Next, create the second color. Enter, 255, 160 and 124 in the R, G and B boxes, respectively (below left). Again, use the Eyedropper tool to drag and drop a color chip just below the top color well in the Fill inspector.
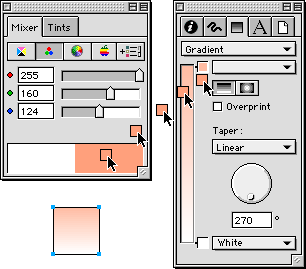
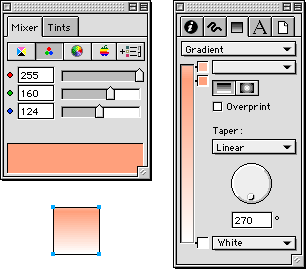
14. When you release the mouse button a second color well will be created and the changes will be reflected in the selected object and the Fill inspector.
15. Continue adding colors one by one in the previous manner until all the colors have been added to the gradient. The finished result is shown in the selected object below.
Examples: Click any thumbnail image below for a lager view
 |  |  |
Next Technique
Source: http://www.sketchpad.net Read More...

1 comments:
Well
Thanks very much !!!
Post a Comment